In the hustle and bustle of modern daily life, paper cups have become an omnipresent sight. Whether it's a bustling coffee shop, filled with the aroma of freshly brewed coffee, or a busy office, where people are engrossed in their work, paper cups are always there. But have you ever paused to wonder about the journey these convenient vessels undertake from raw materials to the finished product? The following is a comprehensive and in - depth introduction to the manufacturing process of paper cups, with a focus on how various key machines in a production line work in harmony to bring this everyday item to life.

1. Material Preparation and Laminating Machinery
The first step is to prepare the necessary materials. High - quality paperboard is the main raw material for making paper cups. This paperboard is usually made of food - grade paper, which meets strict hygiene standards to ensure that it is safe for contact with food and beverages. To make the paper cup waterproof, a Laminating Machinery comes into play. This machine coats a thin layer of polyethylene (PE) plastic on one side of the paperboard. The laminating process not only ensures the paper cup can hold liquid without getting wet and deformed but also adds a certain degree of strength to the paperboard.
2. Sheet Feeding and the Role of Different Machinery in Successive Steps
Once the materials are ready, the paperboard sheets are fed into the paper cup production line.
- 2.1 Printing Stage: If the paper cup is designed to have patterns, logos, or other printed information, a Printing machine is used. This could be a flexographic or offset printing unit. The printing machine precisely transfers the designed graphics onto the paperboard, adding aesthetic value and brand identity to the final product. For example, a coffee shop's logo and unique design can be printed vividly on the cup, attracting consumers.
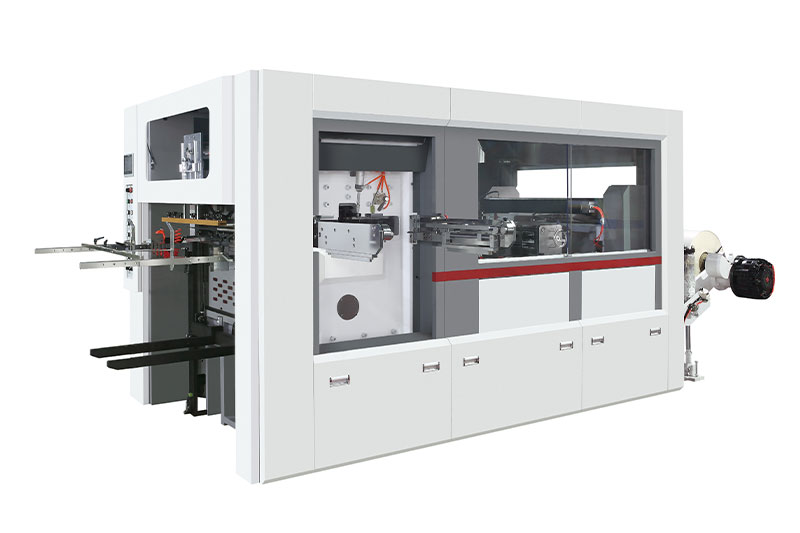
- 2.2 Die - Cutting Stage: After printing (if applicable), the paperboard sheet moves to the Die - Cutting machinery. This machine cuts the paperboard into the appropriate shape, usually a rectangle with specific dimensions according to the cup's design. The die - cutting process is crucial as it determines the basic shape of the cup body, ensuring precision and consistency in each cut piece.
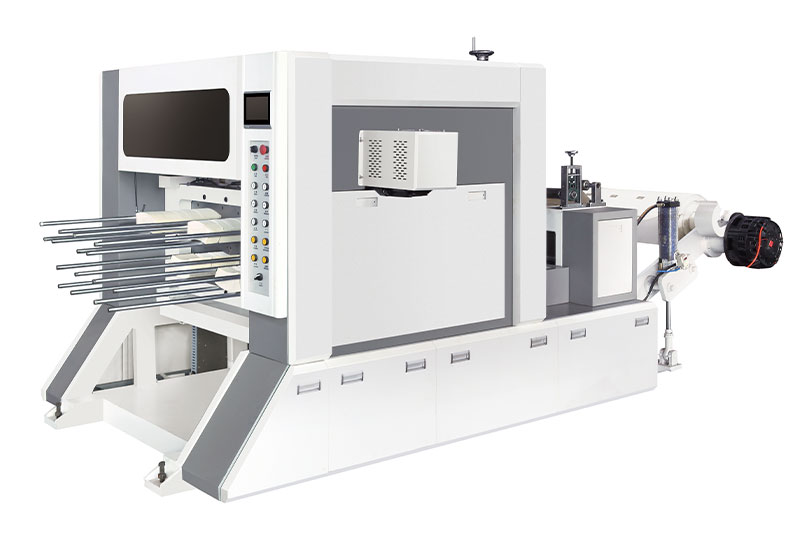
- 2.3 Roll Automatic Punching Stage: Before the forming stage, a Roll automatic punching machine can be involved in some production lines. This machine is used to create small holes or perforations in the paperboard if there are specific design requirements. For instance, if the cup needs to have a ventilation function or a tear - off part, the roll automatic punching machine can accurately punch the paperboard according to the pre - set patterns. It works by rolling the paperboard through a set of punching dies, which strike the paperboard at high speed to create the desired holes or shapes. This process requires precise control of the punching force and the movement of the paperboard to ensure the quality of the punched patterns.
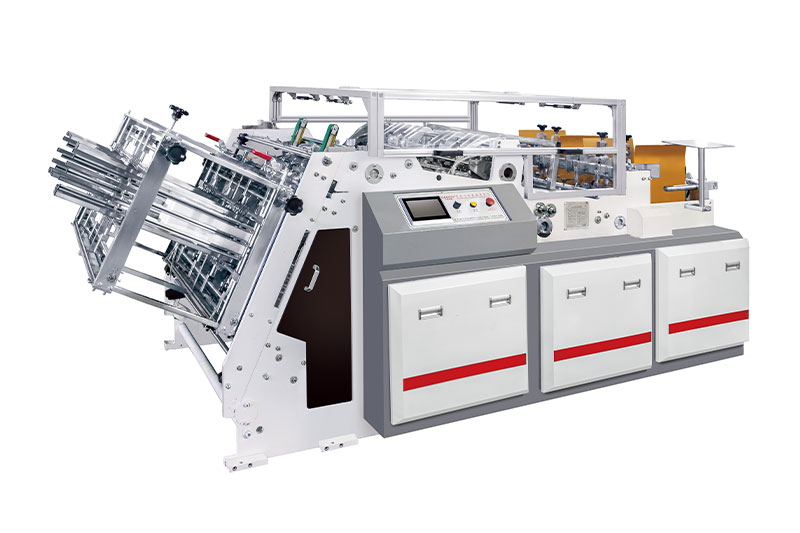
- 2.4 Forming Stage: The rectangular paperboard then enters the Forming machinery. Here, the sheet is rolled around a cylindrical mold. Heat and pressure are applied during this process. The heat melts the PE coating on the paperboard, allowing the edges of the paperboard to bond together, thus forming the cylindrical body of the paper cup. The forming machinery needs to operate with high precision to ensure the cup body has a uniform shape and thickness.
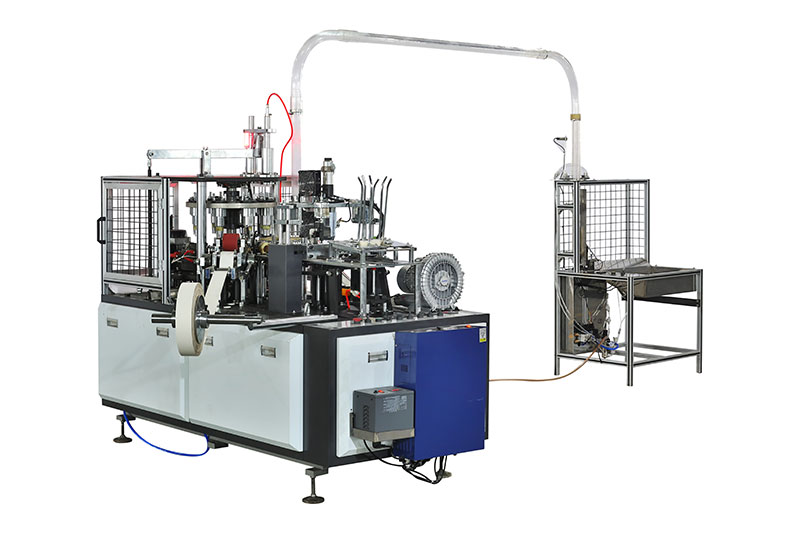
- 2.5 Bottom Attachment with Stamping Machinery: A pre - cut circular paperboard piece, also coated with PE, is used as the bottom of the cup. Stamping machinery is utilized to attach the bottom to the cup body. The cup body and the bottom are aligned, and then through the stamping process, which combines heat - sealing and pressure - applying, the PE coatings on both the cup body and the bottom are melted, creating a strong and waterproof bond. This ensures that the bottom is firmly attached to the cup and can withstand the weight of the liquid inside.
3. Trimming and Finishing
After the bottom is attached, the paper cup may have some rough edges or excess materials. The machine has a trimming mechanism that trims these edges to give the cup a neat and smooth appearance. In addition, some paper cups may undergo further finishing processes, such as curling the rim of the cup. This curling process not only makes the cup more comfortable to hold but also enhances its overall strength and durability.
4. Quality Inspection
Finally, the newly made paper cups go through a strict quality inspection. The inspection mainly focuses on aspects such as the integrity of the cup body, the tightness of the bottom - cup - body connection, and the quality of the printing (if any). Cups that do not meet the quality standards are removed from the production line. Only those that pass the inspection are considered qualified products and are ready to be packaged and distributed for use.
In conclusion, the process of making a paper cup in a machine involves multiple precise and coordinated steps, with each machine like Printing, Die - Cutting, Roll automatic punching, Forming, and Stamping machinery playing a vital role in ensuring the production of high - quality, safe, and aesthetically pleasing paper cups.